SuiteCRM 全功能,不限用户
SuiteCRM 与 Salesforce 和 Dynamics 一样强大,具有更高的技术独立性和定制性。业务咨询与服务,请联系:188-9654-1629
我们提供的服务包括:插件开发、主题开发、安装和配置、CRM升级、CRM部署、支持与维护、用户培训…
目录
- 文件位置
- 定制化
- 定制模块
- 预先存在的模块
- 做出改变
- 使用Smarty模板自定义

SuiteCRM遵循MVC(模型-视图-控制器)模式,因此具有视图的概念。视图负责收集和显示数据。SuiteCRM中有许多默认视图。这些包括:
列表显示
显示记录列表,并提供这些记录的EditView和DetailView的链接。ListView还允许某些操作,例如删除和批量更新记录。(通常)这是模块的默认视图。
详细视图
显示单个记录的详细信息,还显示相关记录的子面板。
编辑视图
EditView允许编辑记录的各个字段并提供对这些值的验证。
文件位置
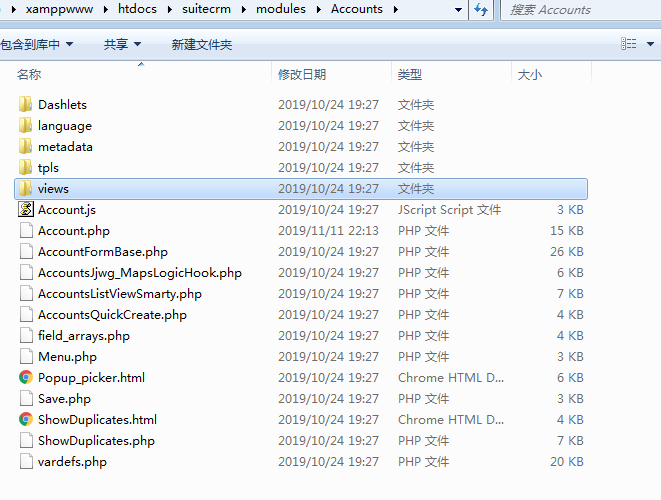
可以在以下位置找到视图 modules/<TheModule>/views/ 或者,对于自定义视图, custom/modules/<TheModule>/views/,并以以下格式命名: view.<viewname>.php。例如,可以在以下位置找到“客户详细信息视图”modules/Accounts/views/view.detail.php 带有自定义版本 custom/modules/Accounts/views/view.detail.php。如果存在自定义版本,则使用该版本。如果不是,则使用模块版本。最后,如果这两个都不存在,则在include/MVC/View/views/。
定制化
为了自定义视图,我们首先需要创建适当的视图文件。具体取决于我们希望定位的模块。
定制模块
在这种情况下,我们可以将文件直接放入我们的模块中。在以下位置创建一个新文件(如果不存在) modules/<TheModule>/views/view.<viewname>.php。内容将类似于:
<?php

require_once 'include/MVC/View/views/view.<viewname>.php';

if(!defined('sugarEntry') || !sugarEntry) die('Not A Valid Entry Point');
class <TheModule>View<ViewName> extends View<ViewName>
{

}
一个更具体的示例是自定义模块ABC_Vehicles的详细信息视图:
<?php

require_once 'include/MVC/View/views/view.detail.php';

if(!defined('sugarEntry') || !sugarEntry) die('Not A Valid Entry Point');
class ABC_VehiclesViewDetail extends ViewDetail
{

}
预先存在的模块
对于预先存在的模块,您需要将视图添加到custom/modules/<TheModule>/views/view.<viewname>.php。
该文件的内容将取决于您是希望扩展现有视图(如果存在)还是完全创建自己的版本。通常最好扩展现有视图,因为这将保留重要的逻辑。请注意此处的命名约定。我们给班级命名Custom<TheModule>View<ViewName> (例如 CustomAccountsViewDetail)。
在这里,我们不扩展现有视图或不存在这样的视图:
<?php
if(!defined('sugarEntry') || !sugarEntry) die('Not A Valid Entry Point');

require_once 'include/MVC/View/views/view.<viewname>.php';

class Custom<TheModule>View<ViewName> extends ViewDetail
{

}
否则,我们将扩展现有视图。请注意,我们需要现有视图:
<?php
if(!defined('sugarEntry') || !sugarEntry) die('Not A Valid Entry Point');

require_once 'modules/<TheModule>/views/view.<viewname>.php';

class Custom<TheModule>View<ViewName> extends <TheModule>View<ViewName>
{

}
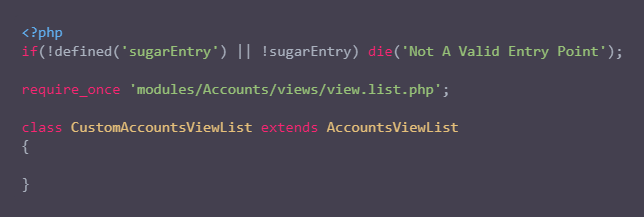
例如,覆盖客户的列表视图:
<?php
if(!defined('sugarEntry') || !sugarEntry) die('Not A Valid Entry Point');

require_once 'modules/Accounts/views/view.list.php';

class CustomAccountsViewList extends AccountsViewList
{

}
做出改变
现在我们有了一个自定义视图,我们实际上可以做什么?视图具有多种方法,我们现在可以覆盖这些方法来更改/添加行为。最常见的要覆盖的是:
preDisplay
明确旨在允许在调用display()之前调用逻辑。这可用于更改列表视图的参数或输出要显示在主显示代码之前的任何内容(例如,添加JavaScript)。
display
显示视图的实际工作。可以重写以更改此行为或在主显示之后输出任何内容。您通常要调用parent :: display(); 以确保运行显示代码(当然,除非您要添加自己的显示逻辑)。
使用Smarty模板自定义
您可以使用Smarty模板为自定义视图创建复杂的HTML,而不是在PHP中使用HTML文件。
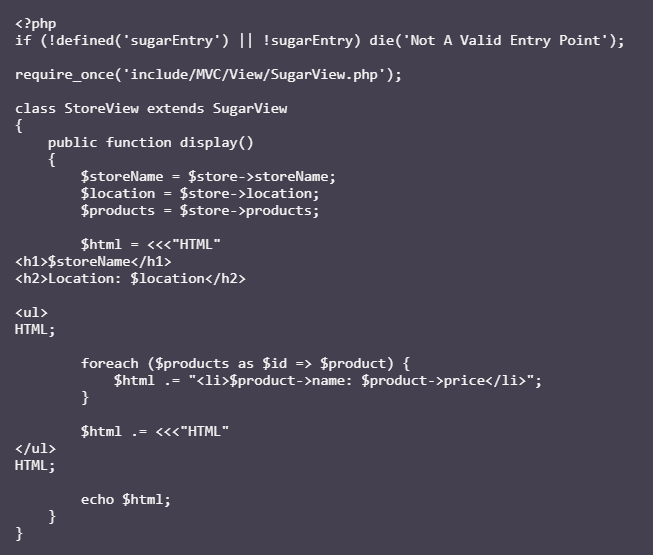
假设您要添加一个名为的自定义模块Store,并且已经在custom/modules/Store/views/view.store.php 在HEREDOC和字符串中使用HTML来创建动态页面的代码:
<?php
if (!defined('sugarEntry') || !sugarEntry) die('Not A Valid Entry Point');

require_once('include/MVC/View/SugarView.php');

class StoreView extends SugarView
{
    public function display()
    {
        $storeName = $store->storeName;
        $location = $store->location;
        $products = $store->products;

        $html = <<<"HTML"
<h1>$storeName</h1>
<h2>Location: $location</h2>

<ul>
HTML;

        foreach ($products as $id => $product) {
            $html .= "<li>$product->name: $product->price</li>";
        }

        $html .= <<<"HTML"
</ul>
HTML;

        echo $html;
    }
}
这行得通,但是看起来不太好,并且很难维护和理解。您正在将后端逻辑与前端HTML结合在一起,我们应尽量避免这样做。
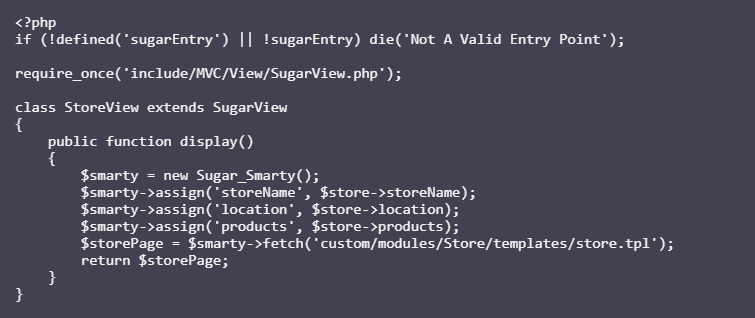
相反,我们可以使用Smarty模板完成相同的操作。我们可以更改custom/modules/Store/views/view.store.php文件以仅提供Smarty模板的变量,而不是创建HTML本身。
<?php
if (!defined('sugarEntry') || !sugarEntry) die('Not A Valid Entry Point');

require_once('include/MVC/View/SugarView.php');

class StoreView extends SugarView
{
    public function display()
    {
        $smarty = new Sugar_Smarty();
        $smarty->assign('storeName', $store->storeName);
        $smarty->assign('location', $store->location);
        $smarty->assign('products', $store->products);
        $storePage = $smarty->fetch('custom/modules/Store/templates/store.tpl');
        return $storePage;
    }
}
然后,我们将在创建一个文件custom/modules/Store/templates/store.tpl,如下所示:
<h1>{$storeName}</h1>
<h2>Location: {$location}</h2>

<ul>
    {foreach name=productsIteration from=$products key=id item=product}
        <li>{$product->name}: {$product->price}</li>
    {/foreach}
</ul>
简单得多!
您可以在Smarty文档中阅读有关Smarty模板文件及其语法的更多信息。

